tightvncserver +输入法+字体
vnc Kuwaedu.com 5901
Ssh 6000
Sudo apt-get install tightvncserver 运行
tightvncserver
此时,会要求输入密码,总共输入4次,具体看提示吧!截图如下:
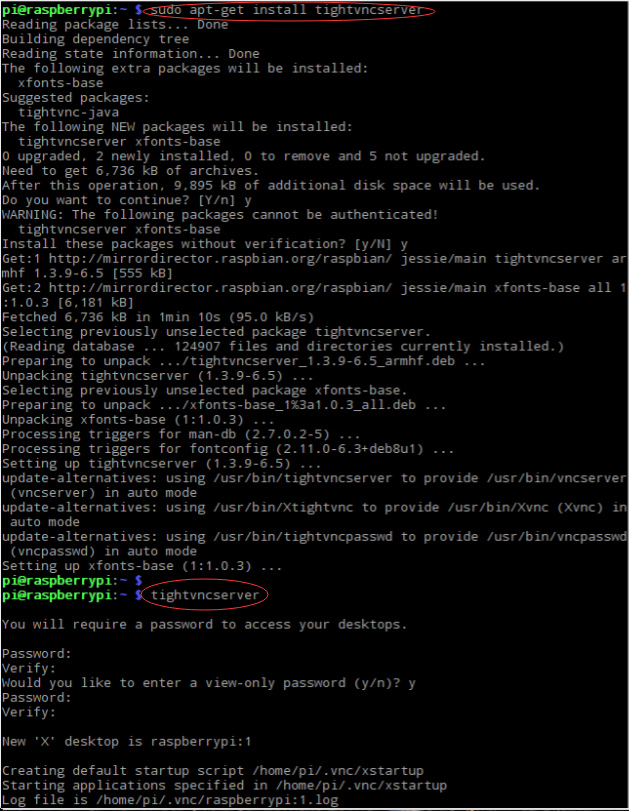
IP地址后的数字不要忽略,从1 开始…,我是了1,2,3都行,换据话说,可以多台PC 同时连接上来,估计每个的桌面内容不同…
vnc 复制
sudo apt install autocutsel
中文字体
sudo apt-get install ttf-wqy-zenhei
中文输入法
sudo apt-get install scim-pinyin
安装FCITX框架和输入法:
apt install -y fcitx fcitx-googlepinyin
或者简略一点直接安装fcitx-googlepinyin,系统默认安装fcitx依赖程序:
apt install -y fcitx-googlepinyin
开机启动 tightvncserver
    vim /usr/lib/systemd/system/tightvncserver.service

    [Unit] Description=tightvncserver Documentation=<https://github.com/GoogleCloudPlatform/kubernetes> [Service] ExecStart=/usr/bin/tightvncserver :1 Restart=on-failure LimitNOFILE=65536 [Install] WantedBy=multi-user.target systemctl daemon-reload systemctl enable tightvncserver.service systemctl start tightvncserver.service

    首先把以下内容写入 /etc/init.d/tightvncserver

    \#!/bin/sh
    \#\#\# BEGIN INIT INFO
    \# Provides: tightvncserver
    \# Required-Start: $syslog $remote\_fs $network
    \# Required-Stop: $syslog $remote\_fs $network
    \# Default-Start: 2 3 4 5
    \# Default-Stop: 0 1 6
    \# Short-Description: Starts VNC Server on system start.
    \# Description: Starts tight VNC Server. Script written by James Swineson.
    \#\#\# END INIT INFO
    \# /etc/init.d/tightvncserver
    VNCUSER='pi'
    case "$1" in
     start)
     su $VNCUSER -c '/usr/bin/tightvncserver :1'
     echo "Starting TightVNC Server for $VNCUSER"
     ;;
     stop)
     pkill Xtightvnc
     echo "TightVNC Server stopped"
     ;;
     \*)
     echo "Usage: /etc/init.d/tightvncserver {start|stop}"
     exit 1
     ;;
    esac
    exit 0

    \#!/bin/sh \#\#\# BEGIN INIT INFO \# Provides: tightvncserver \# Required-Start: $local\_fs \# Required-Stop: $local\_fs \# Default-Start: 2 3 4 5 \# Default-Stop: 0 1 6 \# Short-Description: Start/stop tightvncserver \#\#\# END INIT INFO \# More details see: \# <http://www.penguintutor.com/linux/tightvnc> \#\#\# Customize this entry \# Set the USER variable to the name of the user to start tightvncserver under VNCUSER='pi' \#\#\# End customization required eval cd ~$USER case "$1" in start) \# 启动命令行。此处自定义分辨率、控制台号码或其它参数。 su $USER -c '/usr/bin/tightvncserver -geometry 800x600 :1' echo "Starting TightVNC server for $USER " 更多内容,访问:<http://www.shumeipai.net> ;; stop) \# 终止命令行。此处控制台号码与启动一致。 su $USER -c '/usr/bin/tightvncserver -kill :1' echo "Tightvncserver stopped" ;; \*) echo "Usage: /etc/init.d/tightvncserver {start|stop}" exit 1 ;; esac exit 0

    然后运行:

    sudo chmod 755 /etc/init.d/tightvncserver
    sudo update-rc.d tightvncserver defaults